Negative Prompting Basics: Removing Glitches & Artifacts
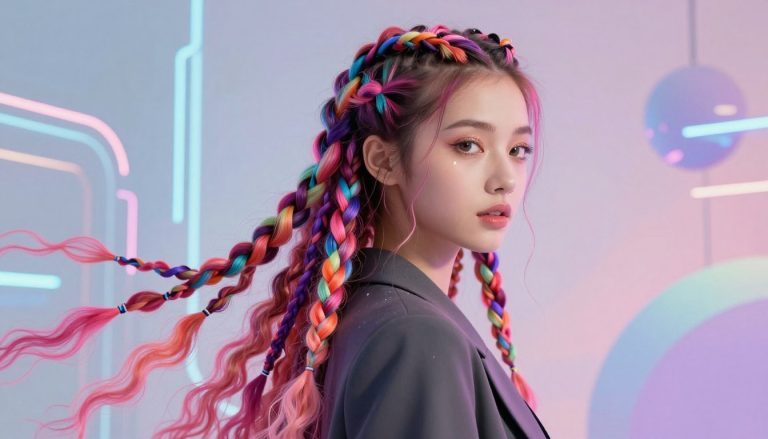
Ever wondered why your digital portraits might have extra fingers or weird facial features? It’s a big problem for creators aiming for perfect images.
Learning to exclude unwanted elements is key to professional results. By knowing how to avoid common mistakes, you can make high-quality visuals easily. Say goodbye to the usual headaches.
This guide offers actionable steps to improve your workflow. You’ll learn how to use specific commands to get rid of errors and unwanted noise. Now, you can control your creative output and make sure every detail is just right.
Key Takeaways
- Understand the core purpose of exclusion commands in image generation.
- Learn to identify and target common visual artifacts for removal.
- Improve the anatomical accuracy of your portrait outputs.
- Master the syntax required to clean up your final designs.
- Apply these techniques to achieve a more professional aesthetic.
Understanding the Role of Negative Prompts in AI Generation
Learning to use AI for image creation means understanding negative prompts. An ai girl negative prompt tells the model what not to include. This helps keep your image clean and professional.
How Negative Prompts Influence Diffusion Models
Diffusion models start with noise and refine it into an image based on your text. The Classifier-Free Guidance (CFG) scale controls how closely the model follows your rules. It helps steer the image away from unwanted patterns.
Setting the CFG scale too high can make the image too rigid. This might cause colors to be too bright or include strange details. Finding the right balance lets you use an ai girl negative prompt effectively. It helps the model ignore certain things to improve the image quality.
The Difference Between Positive and Negative Guidance
Positive guidance tells the model what to include, like specific details or features. Negative guidance, on the other hand, tells it what to exclude. Combining both gives you full control over the image.
| Feature | Positive Guidance | Negative Guidance |
|---|---|---|
| Primary Goal | Define subject details | Remove unwanted artifacts |
| Core Function | Adds visual elements | Filters out noise/glitches |
| Impact on CFG | Increases adherence to style | Increases avoidance of errors |
| Typical Use | Describing the character | Fixing anatomy or blur |
Using an ai girl negative prompt with your positive descriptions helps avoid mistakes. This two-step approach ensures your portraits are polished and intentional. Remember, your negative constraints are just as crucial as your main description.
Setting Up Your Environment for Clean Renders
Getting a clean render begins before you start typing. Your setup is the base for every image. By matching your hardware and software, your AI model will work best.
Choosing the Right Model for High-Quality Portraits
Picking the right model is crucial. Models are trained on different data, affecting your portraits’ look. Choose one that fits your style, from realistic to digital art.
Consistency is important in portrait generation. Changing models often can mess up your look. Make sure your model supports the features you want for your designs.
Configuring Sampling Steps and CFG Scale
After picking your model, adjust your sampling steps and CFG scale. These settings control how closely the AI follows your prompt and adds detail. Too high, and your images might look over-processed.
To get a clean render, follow these tips:
- SD 1.5 Models: Aim for a CFG scale between 7 and 12 for balanced results.
- SDXL Models: Use a lower CFG scale, typically between 5 and 9, to prevent artifacts.
- Sampling Steps: Start between 20 and 30 steps to find the sweet spot for your specific model.
Try different settings to find what works best for you. Small changes in CFG scale can fix noise or texture issues. Taking time to adjust these settings will improve your final results.
Essential ai girl negative prompts for Beginners
Beginners find that telling the AI what not to do is key to quality images. When making portraits, the AI might struggle with details, causing errors. Using ai girl negative prompts helps steer the AI clear of these issues.
Core Keywords for Anatomy and Proportions
Getting anatomy right is tough, especially with older models like SD 1.5. By excluding certain terms, you can avoid distorted limbs. This ensures your characters have the right proportions.
To keep your characters looking right, add these to your negative prompts:
- extra fingers, mutated hands, poorly drawn hands
- fused fingers, missing limbs, malformed limbs
- long neck, disfigured, gross proportions
“The quality of your output is directly proportional to the clarity of your negative constraints.”
Addressing Common Facial Distortions
Facial features can melt or get misaligned. If your subjects have uneven eyes or a weird mouth, update your prompts. Specific ai girl negative prompts can fix these issues, making faces look natural.
Use these terms to avoid facial mistakes:
- bad anatomy, blurry eyes, crossed eyes
- cloned face, deformed iris, extra teeth
- bad teeth, mutated mouth, distorted face
Using these basic keywords helps your projects. Remember, ai girl negative prompts aren’t a cure-all. But they give the AI a clear path. Start with these, and you’ll see your images improve right away.
Advanced Techniques for Artifact Removal
Getting top-notch results often means fine-tuning your negative constraints with care. While basic keywords are a good start, some visual mistakes need a detailed fix. Learning artifact removal is key to making your images look sharp and on purpose.

Identifying Common Glitches in AI Portraits
First, you need to spot problems fast. AI portraits often have unnatural skin textures, wrong limb sizes, or odd background issues. You might see extra fingers, fuzzy faces, or color spills around clothes.
By learning to recognize these issues, you can pick the right ai girl negative prompt to fix them. Keep a list of common problems. This helps you tackle them before starting the image.
Using Weighting Syntax to Strengthen Negative Prompts
When you find a tough error, use weighting syntax to make the model focus more. Most tools let you use parentheses to boost certain terms. For example, (extra fingers:1.5) tells the model to really work on avoiding wrong hands.
This artifact removal trick works well for hard-to-get rid of issues. You can tweak the numbers to match your model’s needs. Trying different weights is the best way to improve your ai girl negative prompt collection and get better results.
Step-by-Step Guide to Refining AI Girl Anatomy
Improving digital subjects’ anatomy starts with smart prompting. Using ai girl negative prompts is powerful, but they need clear, detailed positive prompts. This balance helps fix common errors in AI portraits.
Correcting Hand and Finger Malformations
Hands are hard for AI to get right. Instead of just using ai girl negative prompts, describe the hand pose clearly. Say things like “hands resting on lap” or “fingers interlaced” to guide the AI.
If hands still look wrong, add extra digits or malformed hands to your negative list. This mix of positive and negative prompts helps achieve a natural look. Always focus on clear pose descriptions.
Fixing Eye Alignment and Pupil Irregularities
Uneven eyes or pupils can spoil a portrait. Use ai girl negative prompts like strabismus, lazy eye, or asymmetric pupils to avoid these issues. These keywords help filter out common eye problems.
Also, add “focused gaze” or “symmetrical eyes” to your positive prompt. This helps the AI aim for the right look while avoiding bad ones. Keeping your settings consistent leads to more realistic eyes.
Managing Hair and Clothing Clipping Issues
Clipping happens when hair or clothes look unnatural on the body. Use ai girl negative prompts like hair clipping, clothing intersection, or bad anatomy to guide the AI. These terms are crucial for clean, professional images.
Also, simple poses help avoid fabric physics problems. Keeping poses simple reduces clipping errors. Strategic prompting is key to high-quality visuals.
Managing Texture and Skin Quality
Improving the skin of your AI characters needs a careful plan. Getting a clean render means balancing natural pores with avoiding digital flaws.
Removing Unwanted Noise and Grain
Noise and grain can make images look bad. To fix this, use specific prompts to improve quality.
Tags like “worst quality” and “low quality” help a lot. They tell the model to avoid bad patterns. This leads to a clean render that looks great.
Eliminating Over-Smoothing and Plastic Skin Effects
AI models sometimes make skin look like plastic. This happens when they try too hard to remove imperfections.
To solve this, add “smooth skin” or “plastic” to your prompts. This keeps the skin looking real, with pores and lines. Finding the right balance is key for a clean render that looks natural.
Handling Background and Composition Artifacts
Even the most stunning subject can lose its impact if the surrounding environment is filled with visual noise. Achieving a professional finish often requires effective artifact removal to ensure the focus remains exactly where you intend. By refining your negative prompts, you can guide the model to ignore distracting elements that detract from your primary composition.
Removing Floating Objects and Background Clutter
AI models sometimes struggle with spatial awareness, leading to random objects appearing behind your subject. You can mitigate this by adding specific terms to your negative prompt, such as floating items, cluttered background, or extra limbs. These simple additions help the generator prioritize a clean, logical space.
If you notice persistent debris, try increasing the weight of your negative prompts. This forces the model to reconsider the composition and prioritize a more minimalist or structured environment. Consistent artifact removal ensures that your subject stands out without competing for visual attention.
Fixing Perspective and Depth-of-Field Glitches
Complex scenes often suffer from warped lines or bent walls, especially in architectural settings. To maintain geometric integrity, include terms like distorted perspective, warped architecture, or bent lines in your negative prompt library. These keywords act as a guardrail for the model, keeping structural elements straight and realistic.
Depth-of-field issues can also ruin an otherwise perfect render. If the background appears too sharp or unnaturally blurred, you can use negative prompts to stabilize the focus. The following table provides a quick reference for common issues and how to address them effectively.
| Issue Type | Negative Prompt Keyword | Expected Result |
|---|---|---|
| Floating Objects | floating, detached, debris | Clean, grounded environment |
| Warped Architecture | bent walls, distorted lines | Perfect geometric alignment |
| Depth Glitches | flat background, over-blurred | Natural depth-of-field |
| Visual Clutter | messy, chaotic, busy | Simplified, focused scene |
Optimizing Negative Prompts for Specific Art Styles
Your artifact removal process changes based on the art style. Whether it’s photorealistic portraits or anime art, each model has its own way of understanding prompts. This means a single approach won’t work for all. Understanding these nuances helps keep your work quality high.
Some models, like Flux, aren’t made for traditional negative prompts. They work best with a CFG value of 1. So, focus more on positive prompts than negative ones.
Adjusting Prompts for Photorealistic Renders
For photorealism, aim to remove digital artifacts that make images look fake. Remove terms like “cartoon,” “3d render,” or “oversaturated colors.” This keeps the image realistic. Also, exclude terms that suggest artificial skin or smoothing.
Use a model that supports negative prompts and target camera errors. Depth-of-field glitches and lens distortion can be fixed by excluding them from your prompts.

Adapting Negative Prompts for Anime and Stylized Art
Stylized art needs specific constraints to keep its look. Avoid terms like “skin pores,” “photographic,” or “dof” to prevent unwanted details. Artifact removal here means keeping line art sharp and colors distinct.
Be careful not to over-prompt, as it can mess up colors or proportions. Keep your negative list short to ensure the model captures the vibrant, clean look of anime.
| Art Style | Primary Focus | Key Negative Terms |
|---|---|---|
| Photorealistic | Texture & Lighting | Plastic, 3D, Cartoon, Oversaturated |
| Anime/Stylized | Line Art & Color | Photographic, Pores, Grain, Blur |
| General Purpose | Anatomy & Structure | Extra fingers, Distorted, Low quality |
Troubleshooting Persistent Rendering Errors
Getting a clean render often means more than just text. When your model keeps showing unwanted stuff, simple words won’t cut it anymore.
Dealing with tough anatomical problems or constant background noise? It’s time to try more advanced tools. They can help you control your output better.
When to Use Embeddings and Textual Inversion
Textual inversion embeddings, like EasyNegative, are super useful. They turn complex quality ideas into one easy-to-use vector. No need for long lists of negative keywords.
Use these embeddings for stubborn glitches that text can’t fix. They’re great for fixing skin textures and anatomical errors quickly. This way, you keep your prompt box simple and get a clean render.
Balancing Negative Prompts with Positive Guidance
It’s key to balance your positive and negative prompts for top-notch results. Too much negative can take away the unique touch of your image.
Start with a few negative prompts and add more as needed. If your image looks dull or lacks depth, try using less negative terms. This balance lets your positive prompt lead the creative process.
| Prompt Type | Primary Function | Best Use Case |
|---|---|---|
| Standard Text | Basic guidance | General style and subject |
| Textual Inversion | Complex artifact removal | Achieving a clean render |
| Weighted Prompts | Intensity control | Fine-tuning specific details |
Testing and Iterating Your Negative Prompt Library
Creating a solid testing cycle is key to making great AI images. Think of your prompts as a living thing. This way, every ai girl negative prompt has a purpose. It keeps your work clean and organized.
Creating a Reusable Negative Prompt Template
Start with a simple base to manage your work. Begin with images using just a few negative terms. Then, add specific keywords to fix any issues. This helps you find out which terms improve your images.
Save the good combinations in a reusable template. Organize your templates by art style or subject. This makes switching them for different projects quick and easy. It keeps your ai girl negative prompt library effective and organized.
Documenting Results for Consistent Quality
Tracking your progress is key to success. Keep a log of your prompts and how they change your images. This way, you make data-driven decisions about your work.
Understanding every word in your negative string is crucial. Use the table below to compare different testing methods for your library.
| Method | Pros | Cons | Best For |
|---|---|---|---|
| Minimalist | Fast renders | May miss artifacts | Quick drafts |
| Comprehensive | High precision | Slows generation | Final production |
| Iterative | Balanced control | Requires documentation | Refining styles |
By following this cycle, you’ll get better at controlling your images. Remember, a well-kept ai girl negative prompt collection is your secret to success.
Best Practices for Maintaining Clean Renders
Getting a perfect image is more than just adding lots of keywords. Many think adding more keywords fixes all problems. But, this often makes things worse. A clean render means focusing on quality, not quantity.
Avoiding Over-Prompting and Negative Prompt Bloat
Negative prompt bloat happens when you use too many conflicting terms. A long prompt confuses the model, making effective artifact removal hard. The AI loses focus on what’s important.
Don’t list every flaw. Pick the most important keywords for your issues. A short list helps the model understand you better.
Keeping Your Workflow Organized
Being efficient is key for success. Keep a library of tested negative prompts for different subjects. This organized approach saves time and effort.
Keep track of what works best. This way, you know which terms help and which don’t. Consistency is crucial for mastering the process and keeping your images professional.
Conclusion
Improving your digital art means moving from trial and error to a more structured method. Learning to use ai girl negative prompts well turns a hit-or-miss tool into a reliable one for your projects.
You now know how to build a collection of effective terms to avoid common problems. This precision lets you focus more on your artistic vision, not fighting software issues.
Being consistent is crucial for professional results with Stable Diffusion or Midjourney. By using targeted and model-specific ai girl negative prompts, you prevent quality loss.
Trying new things is key in this fast-changing field. Keep experimenting with different prompts to see how models respond to your specific needs.
Your skill in controlling output quality makes your work stand out from generic images. Use these techniques in your next project. See how your digital portraits improve in clarity and detail.
FAQ
How does the CFG scale influence the effectiveness of an ai girl negative prompt?
The CFG (Classifier Free Guidance) scale is like a steering wheel for models like Stable Diffusion. It controls how well the AI follows your instructions. When using an ai girl negative prompt, a higher CFG scale means the AI will avoid unwanted elements more strictly. But, setting it too high can make images look too perfect or “crispy.” Finding the right balance is key for removing unwanted parts effectively.
What is the best configuration to achieve a clean render in SDXL?
For a clean render, you need to find the right mix of sampling steps and CFG scale. This mix varies depending on the model. For SDXL, you might need a different setup than SD 1.5 to avoid over-processing. Choose the right base model for your art and make sure your environment is set up right to avoid rendering errors.
How can I fix anatomical issues like extra fingers or malformed hands?
To fix anatomical problems, use weighting syntax and specific keywords. For example, (extra fingers:1.5) tells the model to focus more on avoiding extra fingers. This targeted approach is crucial for making your portraits look more realistic.
What is the difference between positive guidance and negative guidance?
A: Positive guidance tells the AI what you want to see, like “cinematic lighting” or “highly detailed skin.” On the other hand, negative guidance filters out unwanted things. Using your ai girl negative prompt as a filter helps remove glitches, while your positive prompt builds the image’s core.
How do I prevent my AI portraits from having a “plastic” or unnatural skin texture?
To get realistic skin, you need to balance things right. Avoid overusing terms like “blur” or “smooth” to prevent a “plastic” look. Instead, focus on removing digital noise and grain to keep the skin looking natural and professional.
When should I use textual inversion embeddings in my workflow?
Use textual inversion embeddings, like EasyNegative, when standard prompts aren’t enough. They help keep your images clean by summarizing complex negative constraints into a single word. This keeps your prompts organized and effective.
How do negative prompts differ when generating photorealistic vs. anime styles?
Different art styles need different approaches. For photorealistic photography, focus on technical flaws like chromatic aberration or low resolution. When creating stylized anime art with models like Flux, adjust your strategy to handle stylized proportions and avoid realistic textures that clash with the style.
How can I eliminate background clutter and floating objects?
A clean render depends on a good background as much as the subject. Use your negative prompt to remove floating objects, clipping artifacts, and perspective errors. This ensures the depth-of-field is right and the composition focuses on the character.
What are the best practices for building a reusable negative prompt library?
Create reusable templates as a safety net for all your generations. Keep track of your results to see which keywords work best for you. This way, you avoid overloading your prompts and keep your workflow efficient for top-notch results.